Tuesday, October 27, 2015

Unit Testing with Karma and Mocha


JavaScript becomes a big hero in these days. If you think about the few years back developers use it only for the client side scripting. But now the time has changed the game. Nowadays JavaScript is really powerful and can use for developing server side functions too. Because of this growth in development in JavaScript, it opens up many paths to thinks to the developer when to do the development. Unit testing is one of the major component of the development process with the rise of the TDD approach. The as much as you do unit testing you can make an assurance about the small pieces of the business logic works as according to expectation. 
As I said in earlier with the growth of the capabilities in the  JavaScript, arise a requirement of the applying TDD approach for the client – side as well. To achieve this TDD approach in client – side developer have to work with a set of tools. In this post aim is to start to write a first unit test in JavaScript. The set of tools going to use for this mention in below.
1). Test Runner – Karma
2). Test Framework – Mocha
3). Test Assertion Tool – Chai
My Folder structure in project,
project/
src/
test/
node_modules/
Inside src folder contain all business logic JavaScript files and test folder contains the unit test JavaScript files. Nodejs module contain in node_modules folder. Using npm init command create package.json file.
Following command line installs karma, mocha, chai assertion library, mocha and chai adapter for the karma at once.
npm install karma mocha chai karma-mocha karma-chai --save-dev

In here we installed karma locally. Benefit of it use we can use different karma version in different projects. But when we start to work with karma, we have to go to bin folder of the karma local installation. So this is bring additional effort to the developer. Run following command to avoid this situation. Before do this needs to uninstall the globally install karma version.

npm install –g karma-cli

Now run below command and create karma configurations.

karma init

After you provide successful answers to the questions ask by the karma configuration process you get the file as in below.
// Karma configuration

module.exports = function(config) {
  config.set({

    // base path that will be used to resolve all patterns (eg. files, exclude)
    basePath: '',


    // frameworks to use
    // available frameworks: https://npmjs.org/browse/keyword/karma-adapter
    frameworks: ['mocha'],


    // list of files / patterns to load in the browser
    files: [
      'src/**/*.js',
      'test/**/*.spec.js'
    ],


    // list of files to exclude
    exclude: [
    ],


    // preprocess matching files before serving them to the browser
    // available preprocessors: https://npmjs.org/browse/keyword/karma-preprocessor
    preprocessors: {
    },


    // test results reporter to use
    // possible values: 'dots', 'progress'
    // available reporters: https://npmjs.org/browse/keyword/karma-reporter
    reporters: ['progress'],


    // web server port
    port: 9876,


    // enable / disable colors in the output (reporters and logs)
    colors: true,


    // level of logging
    // possible values: config.LOG_DISABLE || config.LOG_ERROR ||   
    // config.LOG_WARN || config.LOG_INFO || config.LOG_DEBUG
    logLevel: config.LOG_INFO,


    // enable / disable watching file and executing tests whenever any file changes
    autoWatch: true,


    // start these browsers
    // available browser launchers: https://npmjs.org/browse/keyword/karma-launcher
    browsers: ['Chrome'],


    // Continuous Integration mode
    // if true, Karma captures browsers, runs the tests and exits
    singleRun: false,

    // Concurrency level
    // how many browser should be started simultanous
    concurrency: Infinity
  })
}

In here we installed karma locally. The benefit of it is we can use different karma version in different projects. But when we start to work with karma, we have to go to the bin folder of the karma local installation. So this brings additional effort to the developer. Run the following command to avoid this situation. Before do this needs to uninstall the global install karma version.

Now im going to write my first unit test in “test.spec.js” file as in below.
describe("A test suite", function() {
    
    var num1 = 0;
    
   beforeEach(function() { 
         num1 += 10  
   });
   
   afterEach(function() { 
           
   });
   
   it('should fail', function() {
        expect(num1).to.equal(11);
         });
});

In this test, I created a variable call “num1” and adding the 10 for it each time before test gets to run. The “beforeEach” function runs before all the unit test and “afterEach” function get run after each unit test. In here I use mocha as test framework and chai for assertions for the write unit test. The expect style assertion give the capability to write unit tests in BDD way.

Now start to run unit tests by enter following command as “karma start”. Then you see chrome browser and unit test start to run. Following images shows the result of the unit test run.
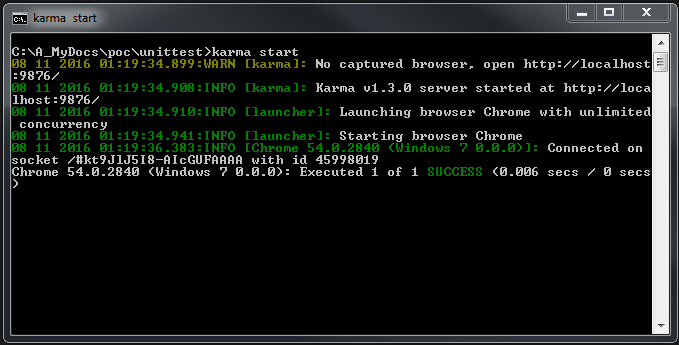


Now you have written your first unit test and run it. Until the next post, Happy Coding Winking smile

Wednesday, October 21, 2015

Nodejs with Visual Studio


Nodejs is a mostly use platform among the web developers in nowadays. When im looking into nodejs I wanted a good tool to write the application. First I started it with using VS Code. But when I was using it I didn’t get that rich user experience like in Visual Studio. Yeah.. I know VS Code still growing and its not a substitution for the Visual Studio. So I start look into the way to develop the Nodejs web application with Visual Studio. Yeah I found it. There is Nodejs tools for visual studio. So I downloaded it from here. This tool is still growing. After you download it and  install go to new project creation in visual studio. Then you can see like below.

image

So I created blank nodejs project using visual studio. It shows like in below.

image

You can see node project created with all the basic dependencies and basic functions. Press F5 and see how it works.

image

It open up browser and shows the respond return from express. Visual Studio provide complete debugging support to develop nodejs applications.

image

And also VS give you intellisense support and Interactive window to code and see the immediate result, NPM package manager support to manage packages in application, source control integration, cloud integration and typescript support.

image

So this is just a start and introduction of creating a nodejs application with Visual Studio using its rich set of features. So in next post ill talk about developing simple nodejs application.  Until then have fun with this tool.

Tuesday, July 28, 2015

TDD with Uncle Bob


Recently I was start to looking into TDD approach in software development. It’s a pretty cool process to follow and make sure you didn’t break any business rule while you do development of the application. I believe TDD must be a one of most essential component in the development. Because if you can write more of unit test it solve the issue of defects related business logic. More of your unit test get corrected it give a help to improve your integration testing too. Finally amount of time needs to spend for manual testing and regression testing can reduce in this way. So I found the three rules of TDD from uncle Bob blog. I'm going to mention those rules in below,

  1. You are not allowed to write any production code unless it is to make a failing unit test pass.
  2. You are not allowed to write any more of a unit test than is sufficient to fail; and compilation failures are failures.
  3. You are not allowed to write any more production code than is sufficient to pass the one failing unit test.

These 3 rules clearly explain what is TDD and why we need to use it. So whenever you follow TDD approach try to keep in these 3 rules in mind. Im going to put the link of the uncle Bob video here to watch you. His explain the TDD as more simpler way to get understand anyone. So watch following link and get to know about the TDD. I’ll write another article about unit testing with NUnit.

Watch this video : Red Green Refactor by Uncle Bob

Sunday, May 10, 2015

Google Tag Manager with ASP.NET MVC – Tracking Page views


Google tag manager makes life so easier for use Google analytic. Because of GTM, marketers can handle the Google analytics without the help of web developer. In this post describe how to use Google tag manager with ASP.NET MVC to track page views of a web application. Setting up the GTM is simple and needs to create the container and put that JavaScript code in your base HTML page. When you use GTM, you have to deal with tags, rules and macros. Every tag must contain a rule to fire. Rule require a certain condition to trigger.

Let's go down with following steps to setup GTM with MVC applications.

1. Login into the Google tag manager and create the container. Enter account name and container name as below.

1

2

2. After create GTM container looks like as in below image. Container id shown with red color boxes.

3

3. Go to your “_Layout.cshtml” page of the MVC application. Copy and paste container content as shown in below, just right after opening tag of “<body>”. In this image shows red color box highlighting the GTM container id. This is a unique id and GTM and application use this id for communication.

4

4. Now you have to publish your application. I used my azure account to publish the application. After you successfully publish you will get your application URL. Using that URL sign up with Google analytic account. After successfully setup the analytic account, you can get your tracking id for the web application. Use the tracking ID to create GTM tags.

6

5. Create a tag as shown in below using analytic tracking ID. Select Tag type as “Universal Analytics” and track type as “Page View”

7

6. Add a rule for this tag as below. this rule will execute when relevant tag fire.

8

7. After all above steps publish your GTM. After you can see the results in your Google analytics dashboard.

Sunday, May 3, 2015

Code snippet plugin for Live Writer on Blogger


I started to use windows live writer as my blogging tool. When I'm starting to use it, I had to face one problem which was how I'm going to publish the articles with code snippets. I’m using Blogger as my blog engine. So plugin I'm looking for must work with blogger too. After few search in the Google, I found few plugins to use code snippets with blog articles. One thing I noticed from all of those tools was none of them not updated very recently. In the end, I selected one tool to use with my live writer for blogging. You can check it from the below link.

https://sourcecodeplugin.codeplex.com/

This tool uses SyntaxHighlighter version 3. That was one of the main reason to select this tool. Because most of other tools not updated with SyntaxHighlighter version 3. When you are going to use this plugin for the first time with the live writer it pops up an error message saying “Can't load configuration from 'C:\Users\username\AppData\Roaming\Windows Live Writer\WindowsLiveWriter.SourceCode.config file”. What you have to do is ignore that error and move forward. And it won't appear in the after the first time. This is something known issue and writer of this plugin discuss this in the discussion section in CodePlex site.

Earlier when I want to put code snippet to the blog post I had to keep the code with SyntaxHighlighter tags. Now I don’t need to worry about that. this new plugin does it for me. Now blogging become easier than previous.

Saturday, May 2, 2015

Windows live writer on Blogger


After a long time back I tried to use windows live writer as my blogging tool. I used it early days and suddenly I missed it. So after I install windows live writer 2012 (latest version) I tried connect with my blog. My blog engine is a blogger. I entered correct URL, username and password. I checked that with the browser as well to verify details are correct or not. I tried 2 or 3 times but no luck. I search in the Google and I couldn’t find the good solution for this matter. because of that I thought to write about this then this might be helpful to someone else. The below image shows the error message.

dd

After all the attempts, I found the solution. In my Google account, I activated the 2-way verification system to my Google account for unknown applications and devices. When I'm logging through unknown device’s browser I get the security code and I enter it can use the particular Google service.  But with live writer there is no any method to use it that way. Because of that I need to go to below link and add live writer. Then I get generated password by Google. I have to use it for the sign in with live writer and blogger.

https://security.google.com/settings/security/apppasswords

After complete above steps, I logged in successfully with my live writer and the blogger. So here after all blog post will come through the live writer.

Happy blogging. Ohhh yeahh Winking smile

Tuesday, March 17, 2015

Angular Style Guide by John Papa


AngularJs is a MVC framework use by front-end. This is getting popular among developers for front-end developers because of it rich set of capabilities. Normally when we do the development in back-end development almost every time we are trying to use the best practices and gaudiness as a discipline of the developers. So I thought about the same way about the angular. I looked around the web for that kind of guidelines and best practices for AngularJs. That time I found the set of guidelines given by john papa. I don’t say we should follow of them. Based on the scenario, application and our requirement we can use it for front-end development. So im going to share that link with you guys.

Here we go : https://github.com/johnpapa/angular-styleguide#naming

Happy Coding Folks.

Sunday, November 2, 2014

Error in SharePoint 2013 Visual Web Part : The name "InitializeControl" does not exit in the current context.

When I was do development in the SharePoint 2013, I added visual web part. I worked with VS 2013. When I was try to build the project I got the following error.


This error occurred because of missing the visual web part designer file of type "ascx.g.cs". I did a Google search about this error. All those approaches didn't help me to solve this error. Following shows some links I followed.

http://samer-othman.blogspot.com/2013/03/how-to-fix-error-name-initializecontrol.html
http://sharepoint.stackexchange.com/questions/57034/the-name-initializecontrol-does-not-exist-in-the-current-context-error-when
http://vasya10.wordpress.com/tag/initializecontrol/
http://www.psclistens.com/blog/2014/4/the-dreaded-%E2%80%9Cthe-name-%E2%80%98initializecontrol%E2%80%99-does-not-exist-in-this-context%E2%80%9D-error-when-working-with-visual-web-parts-in-visual-studio-2012.aspx

Solution

My SharePoint solution runs under "SpSetup" user. I checked this user has permission on content DB of the SharePoint site I'm pointing to host Visual Web Part. Then I see that doesn't had the permission to the content DB. I gave the permission to that user as "db_owner" in content DB.


After that I removed the visual web part from the solution and add new one with same name and with the same content. Bang... "ascx.g.cs" file showed up with visual web part. Later I build the solution and it ended in successfully.

Wednesday, October 15, 2014

Customize ASP.NET Identity

In ASP.NET used several methodologies for authentication and authorization for the user. First used ASP.NET membership system then ASP.NET simple membership system. After that used ASP.NET Universal Providers. After all of these methodologies now Microsoft recommend to use ASP.NET Identity which is introduce with eliminating most of faults and loopholes contain with previous methods. You can read about more information from here.

In this post I'm going to shows the way of customize the ASP.NET identity match with our own business scenario.When you create the MVC application using default template in Visual Studio, it creates the schema using code-first method for authentication and authorization. In this post I'm going to show how customize the role entity, user entity and use our own database for the schema. First create the empty MVC project like in below.


Then install following packages from NuGet as shown in below. 


First of all create the custom user class and custom role class. Custom user class inherit from IdentityUser and Custom role class inherit from IdentityRole. Following shows CustomIdentityUser class. FirstName and LastName added to the custom user class. Like this we can add any custom field we need according to the business scenario.
public class CustomIdentityUser : IdentityUser
 {
  public string FirstName { get; set; }
  public string LastName { get; set; }
 }

Following shows CustomIdentityRole class. In here Description added to the custom role class.

public class CustomIdentityRole : IdentityRole
 {
  public string Description { get; set; }

  public CustomIdentityRole()
  { 
  }

  public CustomIdentityRole(string roleName, string description) : base(roleName)
  {
   this.Description = description;
  }
 }

After that create custom DB context as shown in below.
 public class CustomIdentityDbContext : IdentityDbContext
 {
  public CustomIdentityDbContext() : base("connectionString")
  {

  }
 }

Then create new database and create the connection string in web.config file as shown in below. In this example my custom DB name is CustomIdentityDb.


After these steps create OWIN startup class like shown in below. Go to add new items under project and add startup class. This class configure authentication scheme and uses cookie based authentication method in here. Path string point to the security controller action.
public class OwinStartup
 {
  public void Configuration(IAppBuilder app)
  {
   CookieAuthenticationOptions options = new CookieAuthenticationOptions();
   options.AuthenticationType = DefaultAuthenticationTypes.ApplicationCookie;
   options.LoginPath = new PathString("/security/Register");
   app.UseCookieAuthentication(options);
  }
 }

After create OWIN start up class should creates model classes needs for view pages. Model class creates under model folder in project template which are Login and Register.
public class Login
 {
  [Required]
  [Display(Name = "User name")]
  public string UserName { get; set; }

  [Required]
  [DataType(DataType.Password)]
  [Display(Name = "Password")]
  public string Password { get; set; }

  [Display(Name = "Remember me?")]
  public bool RememberMe { get; set; }
 }

public class Register
 {
  [Required]
  public string UserName { get; set; }

  [Required]
  public string Password { get; set; }

  [Required]
  [Compare("Password", ErrorMessage = "The password and confirmation password do not match.")]
  public string ConfirmPassword { get; set; }

  [Required]
  [EmailAddress]
  public string Email { get; set; }

  public string FirstName { get; set; }

  public string LastName { get; set; }
 }

In these models uses basic validation against model properties. Next step is creation of Security controller. Following code snippets shows security controller which contains the login, logout and register actions. Login and register action contains with GET and POST actions. In this application create another controller called ''Home" and redirect success logins to that controller.
 public class SecurityController : Controller
 {

  private UserManager userManager;
  private RoleManager roleManager;

  public SecurityController()
  {
   CustomIdentityDbContext db = new CustomIdentityDbContext();

   UserStore userStore = new UserStore(db);
   userManager = new UserManager(userStore);

   RoleStore roleStore = new RoleStore(db);
   roleManager = new RoleManager(roleStore);
  }

  // GET: Security
  public ActionResult Index()
  {
      return View();
  }

  public ActionResult Register()
  {
   return View();
  }

  [HttpPost]
  [ValidateAntiForgeryToken]
  public ActionResult Register(Register model)
  {
   if (ModelState.IsValid)
   {
    CustomIdentityUser user = new CustomIdentityUser();

    user.UserName = model.UserName;
    user.Email = model.Email;
    user.FirstName = model.FirstName;
    user.LastName = model.LastName;

    IdentityResult result = userManager.Create(user, model.Password);

    if (result.Succeeded)
    {
     userManager.AddToRole(user.Id, "Administrator");
     return RedirectToAction("Login", "Security");
    }
    else
    {
     ModelState.AddModelError("UserName", "Error while creating the user!");
    }
   }
   return View(model);
  }

  public ActionResult Login(string returnUrl)
  {
   ViewBag.ReturnUrl = returnUrl;
   return View();
  }

  [HttpPost]
  [ValidateAntiForgeryToken]
  public ActionResult Login(Login model, string returnUrl)
  {
   if (ModelState.IsValid)
   {

    CustomIdentityUser user = userManager.Find(model.UserName, model.Password);
    
    if (user != null)
    {
     IAuthenticationManager authenticationManager = HttpContext.GetOwinContext().Authentication;
     authenticationManager.SignOut(DefaultAuthenticationTypes.ExternalCookie);
     ClaimsIdentity identity = userManager.CreateIdentity(user, DefaultAuthenticationTypes.ApplicationCookie);
     AuthenticationProperties props = new AuthenticationProperties();
     props.IsPersistent = model.RememberMe;
     authenticationManager.SignIn(props, identity);
     if (Url.IsLocalUrl(returnUrl))
     {
      return Redirect(returnUrl);
     }
     else
     {
      return RedirectToAction("Index", "Home");
     }
    }
    else
    {
     ModelState.AddModelError("", "Invalid username or password.");
    }
   }

   return View(model);
  }

  [HttpPost]
  [Authorize]
  [ValidateAntiForgeryToken]
  public ActionResult LogOut()
  {
   IAuthenticationManager authenticationManager = HttpContext.GetOwinContext().Authentication;
   authenticationManager.SignOut();
   return RedirectToAction("Login", "Security");
  }

  }
}
Now creates views for the login and register actions using scaffolding. After these steps create helper class for the role creation and call it from application start.
public static void CreateRoles()
  {
   CustomIdentityDbContext db = new CustomIdentityDbContext();

   RoleStore roleStore = new RoleStore(db);
   RoleManager roleManager = new RoleManager(roleStore);

   if (!roleManager.RoleExists("Administrator"))
   {
    CustomIdentityRole newRole = new CustomIdentityRole("Administrator", "Administrators can add, edit and delete data.");
    roleManager.Create(newRole);
   }

   if (!roleManager.RoleExists("Operator"))
   {
    CustomIdentityRole newRole = new CustomIdentityRole("Operator", "Operators can only add or edit data.");
    roleManager.Create(newRole);
   }
  }

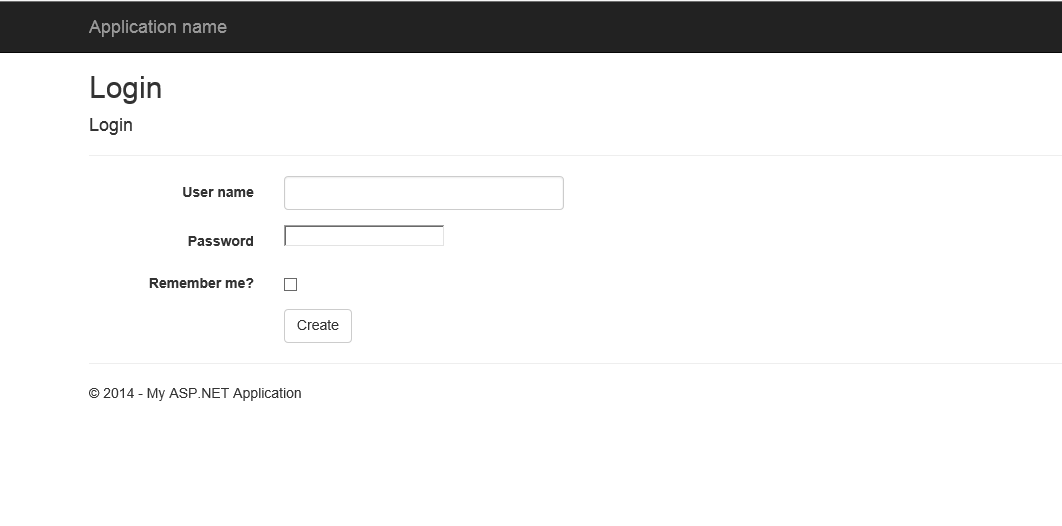
Let's test the application now. After you first run the application all tables needs for operate ASP.NET identity creates in DB. Following shows images of testing of this application.

Database table

Registration view with custom fields

Login view

Wednesday, September 3, 2014

Mobile Apps: Develop once and Run in all platforms

All most every mobile developer would like to reach large audience with all platforms. But the blocker for that approach is each time they want to develop the app again. So it take effort and time. In this kind of a scenario c# developers can use Xamarin and Apache Cordova. In earlier post  I described how to use Nomad visual studio extension to develop mobile app for the apache cordova. In this post going to describe about Microsoft developed visual studio extension for cross-platform mobile applications using HTML, CSS, and JavaScript.

First of all Download and install the extension on Visual Studio 2013 Pro Update 3. This extention gives all the set of tools need for development.


After you set-up the development environment, can create new project as shown in below.


After you create a new project, can change the target development platform going properties of the project. Under properties go to configuration manager window and change it as shown in following image. And also you need to change the Platform under project properties as well.


This VS extension also contain one main page as same like Nomad VS extension which is index html page. And also this project template create with configuration file. You can configure application level settings, specify HTTP uri that can access by application and Apache Cordova capabilities.
And this extension include Apache Cordova intellisense support for common Cordova plugins using both JavaScript and TypeScript.

And one of other main feature I saw in this extension compare with Nomad extension is debugging capability. In Nomad extension you don't get this capability unless you use browser developer tools. At that it was headache for me because of compare with time.

With Nomad VS extension we got only ripple emulator for application simulation purposes. But with this extension you get three options to test your app. First one is you can use ripple as usual. Second native emulators and third option is device. With my experience of developing cross platform mobile application I always choose the device for app simulation purposes. Because most of the time whatever we see in the simulator getting change when we deploy it into device.

So these are the basic details of this new Multi-Device Hybrid app development VS extension. I think this post will help you get start on with this new tool. 

Wednesday, August 13, 2014

SPA with AngularJs


AngularJS is a JavaScript frame work which use to create dynamic web applications. Its runs with plain JavaScript and HTML, so you don’t need use any other things when you are creating a web applications. You can read and learn more about the AngularJs from this link. In this post going to explain about the steps needs to follow when creating a SPA (Single Page Application) with AngualrJS.

Open your visual studio and create an empty web application. Install AngularJS core and router files using NuGet. After that create a folder called “app”. In this folder going to hold the old AngularJS related scripts files. Inside of this folder create a file calle “app.js”. In this JavaScript file is going to initialize all configurations when angular start up. Folder structure would be like as shown in below.

app

---------controller

--------------main.js

--------------submain.js

---------app.js

views

---------main

------------main.html

index.html

inside app folder contain the controller folder. It hold two angular controllers such as main and submain. And there is views folder for keep all the views. There is another subfolder call “main” to hold the views belongs to main controller. Index view is the initial view start in the application. In app.js file place the following code snippets.

var app = angular.module('spaapp', ['spaapp.controllers', 'ngRoute']);

var appctrl = angular.module('spaapp.controllers', []);

app.config(['$routeProvider', '$locationProvider', function ($routeProvider, $locationProvider) {
    $routeProvider
      .when("/",
      {
          templateUrl: "views/main/main.html",
          controller: "main"
      })
      .when("/sub",
      {
          templateUrl: "views/main/submain.html",
          controller: "submain"
      })
      .otherwise({
          redirectTo: '/'
      });

    $locationProvider.html5Mode(true);
}]);
In here main module create as “spaapp”. Its getting inject with “ngRoute” and “spaapp.controllers”. The “ngRoute” use for client side routing inside the application and “spaapp.controllers” use as module of the controllers in the application. after that shows routing configuration of the application. When user navigate to root url, route configuration load the main controller with main.html view. As the same way it does for the “/sub” path.
So lets create content of the index.html view. 
<!DOCTYPE html>
<html xmlns="http://www.w3.org/1999/xhtml">
<head>
    <title></title>
    <base href="/" />
</head>
<body ng-app="spaapp">

  <ng-view></ng-view>

    <script src="Scripts/angular.min.js"></script>
    <script src="Scripts/angular-route.min.js"></script>
    <script src="app/app.js"></script>
    <script src="app/controller/main.js"></script>
    <script src="app/controller/submain.js"></script>
</body>
</html>
Now what we left to do is creation of the main and submain controllers.
main controller
appctrl.controller('main', ['$scope', function ($scope) {
    $scope.message = 'main';
}]);
In main controller use the controller module created earlier in app.js file. This controller inject with $scope for handle the model. In this controller bind message to the $scope property called “message”. Following shows the main.html view for the above controller. This view contain route for the sub controller.
main.html view
<p>The controller name is {{message}}!</p>

<a href="/sub"> Sub Controller </a>
submain controller 
appctrl.controller('submain', ['$scope', function ($scope) {
    $scope.message = 'sub main';
}]);

The submain controller is doing same thing as the main controller. In below showing a submain.html view. This view also same likes the main.html view. It has a link to navigate to the main view.

sub main view
<p>The controller name is {{message}}!</p>

<a href="/"> Back to Main Controller </a>

In this SPA, we load to views dynamically to the index.html. This magic happens through “<ng-view>” tag in the index.html. main and submain views get append to the “<ng-view>” tag when it called through the router. Route configuration handle the controller and view according to the route. Now run the application.
Main View
1_thumb[3]

Sub Main View, you can see url of the browser.

2_thumb[1]

So we created SPA using an AngularJs. Give a try on this.

Happy Coding wlEmoticon-smile[2]

Sunday, August 3, 2014

Windows 8.1 : Flyouts

In windows 8 apps development if wants to integrate flyout for app you don't have any straight forward way to do it. For this kind of a things I used popup control as flyout or third party library like callisto. But in windows 8.1 app development you don't need to be struggle like that way. Because now its integrate with base control library. 

Let's get a scenario like needs to get information from the button click. Now you can do this very simply way setting up the flyout property in the button. 

<Button x:Name="AddButton" Content="Add" Foreground="Black" Height="66" Margin="-3" Width="157" BorderBrush="Black" VerticalAlignment="Top" HorizontalAlignment="Right" FontSize="26.667"> <Button.Flyout> <Flyout Placement="Bottom"> <StackPanel Height="439" Width="294" HorizontalAlignment="Right" Margin="0,5,0,0"> <TextBlock Style="{StaticResource BaseTextBlockStyle}" Text="Add Task" Height="29" FontWeight="Bold" SelectionHighlightColor="{x:Null}" FontSize="21.333" Margin="10,0,10,20"/> <TextBlock HorizontalAlignment="Left" Height="24" Margin="10,0,0,10" TextWrapping="Wrap" Width="145" Text="Projects" FontSize="18.667"/> <ComboBox Height="35" Margin="10,0,10,10"/> <TextBlock HorizontalAlignment="Left" Height="20" Margin="10,0,0,10" TextWrapping="Wrap" Text="Task" Width="199" FontSize="18.667"/> <ComboBox Height="35" Margin="10,0,10,10"/> <TextBlock HorizontalAlignment="Left" Height="30" Margin="111,0,0,10" TextWrapping="Wrap" Text="Hours" Width="77" FontSize="18.667"/> <Slider Height="42" Margin="10,0"/> <TextBox Height="30" Margin="111,0,106,20" TextWrapping="Wrap" Text="1" TextAlignment="Center" BorderThickness="2"/> <CheckBox Content="Billable" Height="37" Margin="7,0,54,10" VerticalAlignment="Stretch" FontSize="18.667"/> <Button Margin="0,5,0,0" Content="Done" Width="120"/> </StackPanel> </Flyout> </Button.Flyout> </Button>

When you click on the add button flyout will shows up like below.


The place where flyout shows up can change using the placment property in the flyout. In above example I used placement position as bottom. You can select top, right, left, full or bottom as placement options. But this depends on the space available on the screen. 

This flyout can have one content item, because of that reason complex UI component must wrapped with StackPanel or Grid item. In this example I used StackPanel. Adding the click event to the button inside the flyout you can perform the action and hide the flyout programmatically.

Sunday, July 20, 2014

Use of ICommand in Windows 8.1 app

Recently I was creating a windows 8.1 app following a MVVM pattern. I was using RelayCommand class in WPF application to create commands that XAML can bind. But unable to build the project because CommandManger class not reference to the WinRT.  The RelayCommand class used for command bind shows in below.

using System; using System.Diagnostics; using System.Windows.Input; namespace WindowsAppMvvm { public class RelayCommand : ICommand { #region Members private readonly Action execute; private readonly Func&lt;bool&gt; canExecute; #endregion #region Constructor public RelayCommand(Action execute) : this(execute, null) { } public RelayCommand(Action execute, Func&lt;Boolean&gt; canExecute) { if (execute == null) throw new ArgumentNullException("execute"); _execute = execute; _canExecute = canExecute; } #endregion #region ICommand Members public event EventHandler CanExecuteChanged { add { if (_canExecute != null) CommandManager.RequerySuggested += value; } remove { if (_canExecute != null) CommandManager.RequerySuggested -= value; } } public Boolean CanExecute(Object parameter) { return _canExecute == null ? true : _canExecute(); } public void Execute(Object parameter) { _execute(); } #endregion } }
Error shown in visual studio.


To solve this issue need to define RelayCommand class without CommandManager. Inside ICommand Members region do following changes.

 1. Remove current CanExecuteChanged event handler and replace with following line
 
public event EventHandler CanExecuteChanged;
 2. Add following method.

public void RaiseCanExecuteChanged() { if (CanExecuteChanged != null) CanExecuteChanged(this, new EventArgs()); }
 Now problem solved and project build successfully.

Tuesday, June 10, 2014

File upload REST service

I needed to create REST service which have capability to upload the file sent from the any client application consume this service.  To achieve this used Web API to create REST service. Following code snippets shows the REST service method written in FileUpload controller.

  /// 
  /// Uploads the file.
  /// 
  /// 
  /// Status of the file upload.
  /// 
  /// 
  public async Task UploadFile()
  {
   if (!Request.Content.IsMimeMultipartContent())
   {
    throw new HttpResponseException(HttpStatusCode.UnsupportedMediaType);
   }

   string root = HttpContext.Current.Server.MapPath("~/App_Data");
   MultipartFormDataStreamProvider provider = new MultipartFormDataStreamProvider(root);

   try
   {
    await Request.Content.ReadAsMultipartAsync(provider);
    return Request.CreateResponse(HttpStatusCode.OK);
   }
   catch (System.Exception e)
   {
    return Request.CreateErrorResponse(HttpStatusCode.InternalServerError, e);
   }
  }

In this scenario client application would be MVC web application. Following shows code snippets for the view.
@{
    ViewBag.Title = "File Upload";
}

File Upload

@ViewBag.Message @using (Html.BeginForm("Index", "Home", FormMethod.Post, new { enctype = "multipart/form-data" })) { }

After needs to create controller action which can get the file from view and upload it via REST service. Action method code snippets shown in below. This controller contain with GET and POST action methods.
  /// 
  /// Indexes this instance.
  /// 
  /// 
  /// Result for the user given request.
  /// 
  [HttpGet]
  public ActionResult Index()
  {
   return View();
  }

  /// 
  /// Indexes the specified file.
  /// 
  /// 
  /// The uploaded file.
  /// 
  /// 
  /// Response for the status of the file upload.
  /// 
  [HttpPost]
  public async Task Index(HttpPostedFileBase file)
  {
   string uploadUrl = "http://localhost/FileUpload/api/FileUpload/UploadFile";

   if (file != null && file.ContentLength > 0)
   {
    try
    {
     using (HttpClient client = new HttpClient())
     {
      using (MultipartFormDataContent content = new MultipartFormDataContent())
      {
       BinaryReader br = new BinaryReader(file.InputStream);
       byte[] buffer = br.ReadBytes(file.ContentLength);
       br.Close();

       content.Add(new StreamContent(new MemoryStream(buffer)), "UploadedFiles", file.FileName);
       HttpResponseMessage httpResponse = await client.PostAsync(uploadUrl, content);

       if (httpResponse.IsSuccessStatusCode)
       {
        ViewBag.Message = "File uploaded successfully";
       }
      }
     }
    }
    catch (Exception ex)
    {
     ViewBag.Message = string.Format("ERROR: {0}", ex.Message);
    }
   }
   else
   {
    ViewBag.Message = "You have not specified a file.";
   }

   return View();
  }

Now run and test the application.


Tuesday, May 13, 2014

Sequence of SQL Query Statement

As a developer all of us write SQL queries for access and manipulate data in  the database. When retrieve data from database SQL query start with SELECT statement. In these SQL queries are create English-like manner. But its logical execution not process like that way. The SELECT statement logically execute in following order.

  1. FROM
  2. WHERE
  3. GROUP BY
  4. HAVING 
  5. SELECT
  6. ORDER BY 
Following SQL query retrieve employee detail from EmployeeLeave table. 


SELECT EmpId, FirstName, COUNT(*) AS NumLeaves
FROM EmployeeLeave
WHERE EmpId = 12
GROUP BY DepId, LeaveYear
HAVING COUNT(*) > 1
ORDER BY EmpId, DepId

But this query logically process in following manner. 

FROM EmployeeLeave
WHERE EmpId = 12
GROUP BY DepId, LeaveYear
HAVING COUNT(*) > 1
SELECT EmpId, FirstName, COUNT(*) AS NumLeaves
ORDER BY EmpId, DepId

Following shows the way of this query works,
  1. Queries the rows from EmployeeLeave table
  2. Filters only records where employee ID equal to 12
  3. Groups the records by department ID and leave year
  4. Filters only groups having more than one leave
  5. Selects for each group the employee ID, first name and number of leaves
  6. Order the rows in the output by employee ID and department ID
The knowing the way of logical execution of SQL query is very important when write the queries for our business scenarios. It give us more understand about how our query works and its a big help to structure the query as well.  

Saturday, April 26, 2014

PhoneGap App : Google Map MarkerClusterer

In last post I was described how to get current location and show it as marker in the map. Let's think a scenario which is you have to show lot of markers in the map. In this case map going to be the fill with markers and user can't get an idea on looking at the map. This going to be loose the user experience. So solution for this kind of a requirement is group the markers in the map. There are various approaches for achieve the solution for this. Today I'm going to explain one method belongs to Clustering which is MarkerClusterer. Clustering  is simplifies your data visualization by consolidating data that are nearby each other on the map in an aggregate form.

The MarkerClusterer is a client side library. This use grid-based clustering to a collection of markers. It works by iterating though the markers in the collection that you wish to cluster and adding each one into the closest cluster if it is within in a minimum square pixel bounds. For demo this approach I used the previous post implementation as basement. Actually this is a extending the previous post implementation.

To develop marker clusterer in your application first you have to reference it in your HTML page. You can download the markerclusterer.js from here. Other than there is no any changes in the HTML page from the previous post.

<!DOCTYPE html> <html> <head> <title>Map View</title> <link href="style/jquery.mobile-1.4.2.css" rel="stylesheet" /> <meta name="viewport" content="width=device-width, initial-scale=1" /> </head> <body> <div data-role="page" id="map-page" data-url="map-page"> <div data-role="header"> <span style="align-content:center;">Map</span> </div> <div data-role="content" data-position="fixed" id="map_canvas"> <!-- map loads here... --> </div> <div data-role="footer"> Footer </div> </div> <!--Jquery--> <script type="text/javascript" src="scripts/jquery-1.9.1.min.js"></script> <!--Jquery Mobile--> <script type="text/javascript" src="scripts/jquery.mobile-1.4.2.js"></script> <!--Cordova--> <script type="text/javascript" src="scripts/cordova.js"></script> <!--Google Map--> <script type="text/javascript" src="https://maps.googleapis.com/maps/api/js?v=3&amp;sensor=true&amp"></script> <!--Google Map Marker Cluster--> <script type="text/javascript" src="scripts/markerclusterer.js"></script> <!--Map View--> <script type="text/javascript" src="scripts/JS/MapView.js"></script> <script type="text/javascript"> $(document).ready( function () { var mapView = new PhoneGapMapApp.MapView(); mapView.init(); } ); </script> </body> </html>
In MapView.js added new methods for create collection of locations, load themarkers to the map, initiate and create the clusterer in the map. After fire devereday event belongs to cordova create the location collection. after the start to create the marker belongs to relevant location in the collection. after create marker collection form locations initiate and create the cluster view in the map. You can see the implementation in below code.

PhoneGapMapApp = {} PhoneGapMapApp.MapView = function () { this._map = null; this._currentLocation = null; this._locations = null; this._markerClusterer = null; } PhoneGapMapApp.MapView.prototype = { init: function () { this._defaultLocation = new google.maps.LatLng(6.5006036, 80.2711642); this._attachEventHandlers(); }, /** * Attach event handlers. */ _attachEventHandlers: function () { document.addEventListener("deviceready", this._onDeviceReady(this), false); }, /** * device APIs are available. */ _onDeviceReady: function (obj) { console.log('device ready'); obj._getRealContentHeight(); obj._loadMap(); obj._identifyCurrentLocation(); obj._loadLocationData(); obj._loadMapMarkers(); }, /** * Setup the content hieght. */ _getRealContentHeight: function () { var header = $.mobile.activePage.find("div[data-role='header']:visible"); var footer = $.mobile.activePage.find("div[data-role='footer']:visible"); var content = $.mobile.activePage.find("div[data-role='content']:visible:visible"); var viewport_height = $(window).height(); var content_height = viewport_height - header.outerHeight() - footer.outerHeight(); if ((content.outerHeight() - header.outerHeight() - footer.outerHeight()) <= viewport_height) { content_height -= (content.outerHeight() - content.height()); } $('#map_canvas').height(content_height); }, /** * create map. */ _loadMap: function () { var myOptions = { zoom: 4, center: this._defaultLocation, mapTypeId: google.maps.MapTypeId.ROADMAP }; this._map = new google.maps.Map(document.getElementById('map_canvas'), myOptions); }, /** * Identify current location. */ _identifyCurrentLocation: function () { if (navigator.geolocation) { browserSupportFlag = true; var that = this; var currentPositionCallback = function (position) { that._identifyCurrentLocationCompleted(position); }; var noGeolocationCallback = function () { that._handleNoGeolocation(browserSupportFlag); }; navigator.geolocation.getCurrentPosition( currentPositionCallback, noGeolocationCallback, { 'enableHighAccuracy': true, 'timeout': 20000 }); } else { browserSupportFlag = false; this._handleNoGeolocation(browserSupportFlag); } }, /** * Handles the situation when current location not found * or not allow from the user for access current location. */ _handleNoGeolocation: function (errorFlag) { this.goTo(this._defaultLocation); }, /** * Current location identify operation success callback. */ _identifyCurrentLocationCompleted: function (position) { this._currentLocation = new google.maps.LatLng( position.coords.latitude, position.coords.longitude); this.goTo(this._currentLocation); }, /** * Show current location in the map. */ goTo: function (position) { this._setMarkerForLocation(position); this._map.setCenter(position); }, /** * Set marker for location. */ _setMarkerForLocation: function (latLng) { var marker = new google.maps.Marker({ position: latLng, map: this._map, title: "You are here !!!" }); }, /** * Load markers for the map. */ _loadMapMarkers: function () { if (this._locations != null) { this._displayParksListInMap(); } }, /** * Create marker list from location details. */ _displayParksListInMap: function () { var markers = []; for (var locationIndex = 0; locationIndex < this._locations.length; locationIndex++) { var location = this._locations[locationIndex]; var marker = null; //Add new location to the markers var latLng = new google.maps.LatLng ( location.LocationLatitude, location.LocationLongitude ) marker = new google.maps.Marker ({ position: latLng, title: location.LocationName }); markers.push(marker); } this._initializeMarkerClusterer(markers); }, /** * Initialize marker cluster view in the map. */ _initializeMarkerClusterer: function (markers) { this._markerClusterer = new MarkerClusterer( this._map, markers, { maxZoom: 18, gridSize: 15 }); }, /** * Create local static data. */ _loadLocationData: function () { var location = {}; var locations = new Array(); location = { LocationID: 01, LocationName: 'Asiri Surgical Hospital', LocationLongitude: 79.880167, LocationLatitude: 6.894737 }; locations.push(location); location = { LocationID: 02, LocationName: 'The Asiri Central Hospital', LocationLongitude: 79.8658391, LocationLatitude: 6.9205805 }; locations.push(location); location = { LocationID: 03, LocationName: 'Majestic City', LocationLongitude: 79.8547562, LocationLatitude: 6.8940211 }; locations.push(location); location = { LocationID: 04, LocationName: 'Liberty Plaza', LocationLongitude: 79.8515386, LocationLatitude: 6.911252 }; locations.push(location); this._locations = locations; } }