Showing posts with label MVC. Show all posts

Wednesday, October 15, 2014

Customize ASP.NET Identity

In ASP.NET used several methodologies for authentication and authorization for the user. First used ASP.NET membership system then ASP.NET simple membership system. After that used ASP.NET Universal Providers. After all of these methodologies now Microsoft recommend to use ASP.NET Identity which is introduce with eliminating most of faults and loopholes contain with previous methods. You can read about more information from here.

In this post I'm going to shows the way of customize the ASP.NET identity match with our own business scenario.When you create the MVC application using default template in Visual Studio, it creates the schema using code-first method for authentication and authorization. In this post I'm going to show how customize the role entity, user entity and use our own database for the schema. First create the empty MVC project like in below.


Then install following packages from NuGet as shown in below. 


First of all create the custom user class and custom role class. Custom user class inherit from IdentityUser and Custom role class inherit from IdentityRole. Following shows CustomIdentityUser class. FirstName and LastName added to the custom user class. Like this we can add any custom field we need according to the business scenario.
public class CustomIdentityUser : IdentityUser
 {
  public string FirstName { get; set; }
  public string LastName { get; set; }
 }

Following shows CustomIdentityRole class. In here Description added to the custom role class.

public class CustomIdentityRole : IdentityRole
 {
  public string Description { get; set; }

  public CustomIdentityRole()
  { 
  }

  public CustomIdentityRole(string roleName, string description) : base(roleName)
  {
   this.Description = description;
  }
 }

After that create custom DB context as shown in below.
 public class CustomIdentityDbContext : IdentityDbContext
 {
  public CustomIdentityDbContext() : base("connectionString")
  {

  }
 }

Then create new database and create the connection string in web.config file as shown in below. In this example my custom DB name is CustomIdentityDb.


After these steps create OWIN startup class like shown in below. Go to add new items under project and add startup class. This class configure authentication scheme and uses cookie based authentication method in here. Path string point to the security controller action.
public class OwinStartup
 {
  public void Configuration(IAppBuilder app)
  {
   CookieAuthenticationOptions options = new CookieAuthenticationOptions();
   options.AuthenticationType = DefaultAuthenticationTypes.ApplicationCookie;
   options.LoginPath = new PathString("/security/Register");
   app.UseCookieAuthentication(options);
  }
 }

After create OWIN start up class should creates model classes needs for view pages. Model class creates under model folder in project template which are Login and Register.
public class Login
 {
  [Required]
  [Display(Name = "User name")]
  public string UserName { get; set; }

  [Required]
  [DataType(DataType.Password)]
  [Display(Name = "Password")]
  public string Password { get; set; }

  [Display(Name = "Remember me?")]
  public bool RememberMe { get; set; }
 }

public class Register
 {
  [Required]
  public string UserName { get; set; }

  [Required]
  public string Password { get; set; }

  [Required]
  [Compare("Password", ErrorMessage = "The password and confirmation password do not match.")]
  public string ConfirmPassword { get; set; }

  [Required]
  [EmailAddress]
  public string Email { get; set; }

  public string FirstName { get; set; }

  public string LastName { get; set; }
 }

In these models uses basic validation against model properties. Next step is creation of Security controller. Following code snippets shows security controller which contains the login, logout and register actions. Login and register action contains with GET and POST actions. In this application create another controller called ''Home" and redirect success logins to that controller.
 public class SecurityController : Controller
 {

  private UserManager userManager;
  private RoleManager roleManager;

  public SecurityController()
  {
   CustomIdentityDbContext db = new CustomIdentityDbContext();

   UserStore userStore = new UserStore(db);
   userManager = new UserManager(userStore);

   RoleStore roleStore = new RoleStore(db);
   roleManager = new RoleManager(roleStore);
  }

  // GET: Security
  public ActionResult Index()
  {
      return View();
  }

  public ActionResult Register()
  {
   return View();
  }

  [HttpPost]
  [ValidateAntiForgeryToken]
  public ActionResult Register(Register model)
  {
   if (ModelState.IsValid)
   {
    CustomIdentityUser user = new CustomIdentityUser();

    user.UserName = model.UserName;
    user.Email = model.Email;
    user.FirstName = model.FirstName;
    user.LastName = model.LastName;

    IdentityResult result = userManager.Create(user, model.Password);

    if (result.Succeeded)
    {
     userManager.AddToRole(user.Id, "Administrator");
     return RedirectToAction("Login", "Security");
    }
    else
    {
     ModelState.AddModelError("UserName", "Error while creating the user!");
    }
   }
   return View(model);
  }

  public ActionResult Login(string returnUrl)
  {
   ViewBag.ReturnUrl = returnUrl;
   return View();
  }

  [HttpPost]
  [ValidateAntiForgeryToken]
  public ActionResult Login(Login model, string returnUrl)
  {
   if (ModelState.IsValid)
   {

    CustomIdentityUser user = userManager.Find(model.UserName, model.Password);
    
    if (user != null)
    {
     IAuthenticationManager authenticationManager = HttpContext.GetOwinContext().Authentication;
     authenticationManager.SignOut(DefaultAuthenticationTypes.ExternalCookie);
     ClaimsIdentity identity = userManager.CreateIdentity(user, DefaultAuthenticationTypes.ApplicationCookie);
     AuthenticationProperties props = new AuthenticationProperties();
     props.IsPersistent = model.RememberMe;
     authenticationManager.SignIn(props, identity);
     if (Url.IsLocalUrl(returnUrl))
     {
      return Redirect(returnUrl);
     }
     else
     {
      return RedirectToAction("Index", "Home");
     }
    }
    else
    {
     ModelState.AddModelError("", "Invalid username or password.");
    }
   }

   return View(model);
  }

  [HttpPost]
  [Authorize]
  [ValidateAntiForgeryToken]
  public ActionResult LogOut()
  {
   IAuthenticationManager authenticationManager = HttpContext.GetOwinContext().Authentication;
   authenticationManager.SignOut();
   return RedirectToAction("Login", "Security");
  }

  }
}
Now creates views for the login and register actions using scaffolding. After these steps create helper class for the role creation and call it from application start.
public static void CreateRoles()
  {
   CustomIdentityDbContext db = new CustomIdentityDbContext();

   RoleStore roleStore = new RoleStore(db);
   RoleManager roleManager = new RoleManager(roleStore);

   if (!roleManager.RoleExists("Administrator"))
   {
    CustomIdentityRole newRole = new CustomIdentityRole("Administrator", "Administrators can add, edit and delete data.");
    roleManager.Create(newRole);
   }

   if (!roleManager.RoleExists("Operator"))
   {
    CustomIdentityRole newRole = new CustomIdentityRole("Operator", "Operators can only add or edit data.");
    roleManager.Create(newRole);
   }
  }

Let's test the application now. After you first run the application all tables needs for operate ASP.NET identity creates in DB. Following shows images of testing of this application.

Database table

Registration view with custom fields
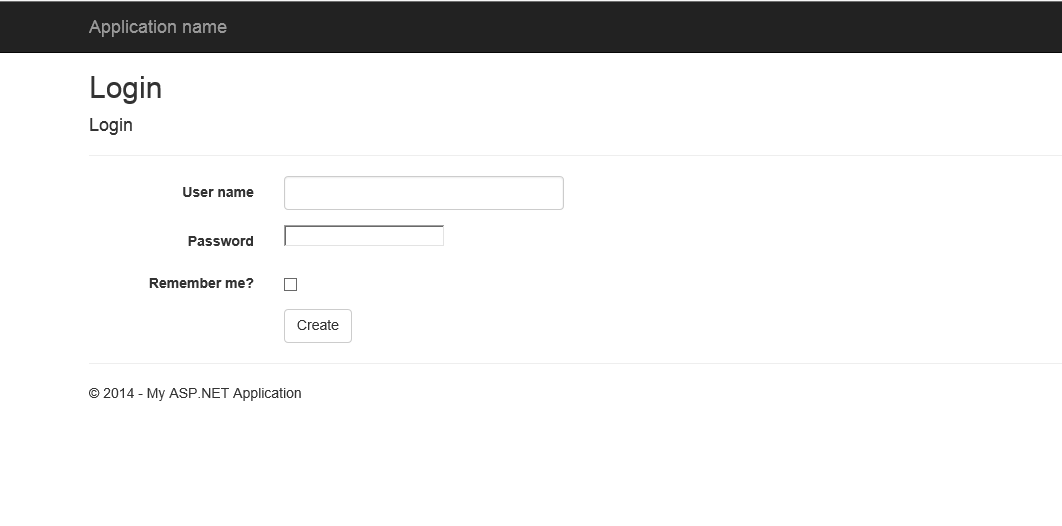
Login view

Wednesday, August 13, 2014

SPA with AngularJs


AngularJS is a JavaScript frame work which use to create dynamic web applications. Its runs with plain JavaScript and HTML, so you don’t need use any other things when you are creating a web applications. You can read and learn more about the AngularJs from this link. In this post going to explain about the steps needs to follow when creating a SPA (Single Page Application) with AngualrJS.

Open your visual studio and create an empty web application. Install AngularJS core and router files using NuGet. After that create a folder called “app”. In this folder going to hold the old AngularJS related scripts files. Inside of this folder create a file calle “app.js”. In this JavaScript file is going to initialize all configurations when angular start up. Folder structure would be like as shown in below.

app

---------controller

--------------main.js

--------------submain.js

---------app.js

views

---------main

------------main.html

index.html

inside app folder contain the controller folder. It hold two angular controllers such as main and submain. And there is views folder for keep all the views. There is another subfolder call “main” to hold the views belongs to main controller. Index view is the initial view start in the application. In app.js file place the following code snippets.

var app = angular.module('spaapp', ['spaapp.controllers', 'ngRoute']);

var appctrl = angular.module('spaapp.controllers', []);

app.config(['$routeProvider', '$locationProvider', function ($routeProvider, $locationProvider) {
    $routeProvider
      .when("/",
      {
          templateUrl: "views/main/main.html",
          controller: "main"
      })
      .when("/sub",
      {
          templateUrl: "views/main/submain.html",
          controller: "submain"
      })
      .otherwise({
          redirectTo: '/'
      });

    $locationProvider.html5Mode(true);
}]);
In here main module create as “spaapp”. Its getting inject with “ngRoute” and “spaapp.controllers”. The “ngRoute” use for client side routing inside the application and “spaapp.controllers” use as module of the controllers in the application. after that shows routing configuration of the application. When user navigate to root url, route configuration load the main controller with main.html view. As the same way it does for the “/sub” path.
So lets create content of the index.html view. 
<!DOCTYPE html>
<html xmlns="http://www.w3.org/1999/xhtml">
<head>
    <title></title>
    <base href="/" />
</head>
<body ng-app="spaapp">

  <ng-view></ng-view>

    <script src="Scripts/angular.min.js"></script>
    <script src="Scripts/angular-route.min.js"></script>
    <script src="app/app.js"></script>
    <script src="app/controller/main.js"></script>
    <script src="app/controller/submain.js"></script>
</body>
</html>
Now what we left to do is creation of the main and submain controllers.
main controller
appctrl.controller('main', ['$scope', function ($scope) {
    $scope.message = 'main';
}]);
In main controller use the controller module created earlier in app.js file. This controller inject with $scope for handle the model. In this controller bind message to the $scope property called “message”. Following shows the main.html view for the above controller. This view contain route for the sub controller.
main.html view
<p>The controller name is {{message}}!</p>

<a href="/sub"> Sub Controller </a>
submain controller 
appctrl.controller('submain', ['$scope', function ($scope) {
    $scope.message = 'sub main';
}]);

The submain controller is doing same thing as the main controller. In below showing a submain.html view. This view also same likes the main.html view. It has a link to navigate to the main view.

sub main view
<p>The controller name is {{message}}!</p>

<a href="/"> Back to Main Controller </a>

In this SPA, we load to views dynamically to the index.html. This magic happens through “<ng-view>” tag in the index.html. main and submain views get append to the “<ng-view>” tag when it called through the router. Route configuration handle the controller and view according to the route. Now run the application.
Main View
1_thumb[3]

Sub Main View, you can see url of the browser.

2_thumb[1]

So we created SPA using an AngularJs. Give a try on this.

Happy Coding wlEmoticon-smile[2]

Tuesday, June 10, 2014

File upload REST service

I needed to create REST service which have capability to upload the file sent from the any client application consume this service.  To achieve this used Web API to create REST service. Following code snippets shows the REST service method written in FileUpload controller.

  /// 
  /// Uploads the file.
  /// 
  /// 
  /// Status of the file upload.
  /// 
  /// 
  public async Task UploadFile()
  {
   if (!Request.Content.IsMimeMultipartContent())
   {
    throw new HttpResponseException(HttpStatusCode.UnsupportedMediaType);
   }

   string root = HttpContext.Current.Server.MapPath("~/App_Data");
   MultipartFormDataStreamProvider provider = new MultipartFormDataStreamProvider(root);

   try
   {
    await Request.Content.ReadAsMultipartAsync(provider);
    return Request.CreateResponse(HttpStatusCode.OK);
   }
   catch (System.Exception e)
   {
    return Request.CreateErrorResponse(HttpStatusCode.InternalServerError, e);
   }
  }

In this scenario client application would be MVC web application. Following shows code snippets for the view.
@{
    ViewBag.Title = "File Upload";
}

File Upload

@ViewBag.Message @using (Html.BeginForm("Index", "Home", FormMethod.Post, new { enctype = "multipart/form-data" })) { }

After needs to create controller action which can get the file from view and upload it via REST service. Action method code snippets shown in below. This controller contain with GET and POST action methods.
  /// 
  /// Indexes this instance.
  /// 
  /// 
  /// Result for the user given request.
  /// 
  [HttpGet]
  public ActionResult Index()
  {
   return View();
  }

  /// 
  /// Indexes the specified file.
  /// 
  /// 
  /// The uploaded file.
  /// 
  /// 
  /// Response for the status of the file upload.
  /// 
  [HttpPost]
  public async Task Index(HttpPostedFileBase file)
  {
   string uploadUrl = "http://localhost/FileUpload/api/FileUpload/UploadFile";

   if (file != null && file.ContentLength > 0)
   {
    try
    {
     using (HttpClient client = new HttpClient())
     {
      using (MultipartFormDataContent content = new MultipartFormDataContent())
      {
       BinaryReader br = new BinaryReader(file.InputStream);
       byte[] buffer = br.ReadBytes(file.ContentLength);
       br.Close();

       content.Add(new StreamContent(new MemoryStream(buffer)), "UploadedFiles", file.FileName);
       HttpResponseMessage httpResponse = await client.PostAsync(uploadUrl, content);

       if (httpResponse.IsSuccessStatusCode)
       {
        ViewBag.Message = "File uploaded successfully";
       }
      }
     }
    }
    catch (Exception ex)
    {
     ViewBag.Message = string.Format("ERROR: {0}", ex.Message);
    }
   }
   else
   {
    ViewBag.Message = "You have not specified a file.";
   }

   return View();
  }

Now run and test the application.


Tuesday, December 10, 2013

Caching in ASP.NET MVC : What, Why and How

What is Caching in ASP.NET MVC ?

Caching is process of storing frequently used information and within high speed memory.


Why do we need caching in ASP.NET MVC ?

Most of the times ASP.NET application requirements makes the scenario to get user and page data from the server in all most every request. Because of this kind of accessing data from server each time directly effect the application performance. To avoid this kind performance and latency issues we can use Caching mechanism.

How do we manage caching in ASP.NET MVC ?

Page Output Caching
- In this method browser cache HTTP GET request for predefined time period. When user request same URL again that call not going to server, instead of that it returns already cache page. Following code snippet show the way of doing it.

[OutputCache(Duration=60, VaryByParam="None", Location="ServerAndClient")] Public ActionResult Index() { return View("Index"); }

Duration defined the time period caching should happen. Setting by location says where we wants to do the caching. In this code it done by both of server and client. Because of that user who request this url from another browser also not send the request to the server. We can defined place to locate the cache. VaryByParam create the different version of cache based on the form or query string parameters. You can create cache profile in the web config and use it in with controller.

Donut and Donut Hole Caching
- Donut and Donut hole caching also belongs to the page caching mechanism. But these two methods not cache full page like in output cache. Donut cache is the server side methodology and it cache entire page other than pieces of dynamic content. Donut hole cache do the opposite of it cache selected sections of the page and not cache entire remaining part of the page.

Windows App Fabric Caching Service
- In web farm solution implementing the caching mechanism getting more complex because of each server share the information created in one sever. To solve this kind of scenario use windows app fabric caching service. ASP.NET is the cache client. Cache client can hold the cache in it local store and communicate with cache cluster. When request the data first look in the local store then it look for the cache cluster. If cache cluster not contain that information looking for then it has go to original information source and get it.  

Data Caching 
- In your business application most of the time request same data frequently. This process directly effect to the performance of the application. Data caching is the solution for this kind scenario. Data caching can apply to the layers between data access and business logic. In between these two layers can cache the frequently request data then each time no need to make database request. Data caching use ObjectCache  and MemoryCache objects for the implementation. 

Application Caching 
- In this method use Application Cache API (AppCache) in HTML5. This give access to the local browser cache. To use application cache needs to create application cache manifest, reference manifest and transfer manifest to the client. When application cache enabled browser fetch it only three cases,
a). When makes the any changes to the manifest
b). When clear the cache by user
c). When cache updated by programmatically


Wednesday, April 10, 2013

State Management : What, Why and How


In this article focus on state management in ASP.NET MVC.

What is state management ? 


State Management is the process followed by developers in web application development to maintain state and page information over multiple request for the same or different pages.


Why do we need to manage state ?

The main way of communicating with internet  HTTP. This HTTP protocol is stateless. It doesn't know anything about last request. Not having to remember user's last request web server can handle many concurrent users. ASP.NET MVC is designed with this stateless nature of HTTP. Because of this reason when we needs to remember user last request or user information we have to take the approach of state management.

 How do we manage state in ASP.NET MVC ?

Client - Side 

Cookies  - small set of information passed to there server in every HTTP request. According to the requirement can set the expiration time for the cookies.

Query String - information appended to the URL. For secure the information can use HTTPS.

Hidden fields - Store value in the form hidden field. this value can use to send sever and operation of the client side.

Server - Side

Cache - cache object available for the all class within the application. This cache object can access through any user or page in the application domain.


Session - Information stored in the server and unique for the each user. There are mainly two method of session management which are InProc and OutProc. InProc use the web server memory and it comes with by default in IIS. In distributed application needs to use OutProc method. There are two method in OutProc way which are State server and SQL server. To use these methods in distribute application have to made changes to web config.

Profile - Information stored based on user name in a database. The profile is part of Membership and Roles provider.